The Basics
This guide will run through everything you need to know to get started using Loris Settings Manager by showing you how to:
- Configure a setting
- Use that setting in your code
- Create a settings menu to control that setting
You can also find a video here covering all of the same ground if you'd prefer.
Installing
If you haven't already, you will need to add the Loris Settings Manager to your Unity Project by downloading it from the Asset Store. Make sure you import the entire package into your project and not just a couple of files.
Configure Settings
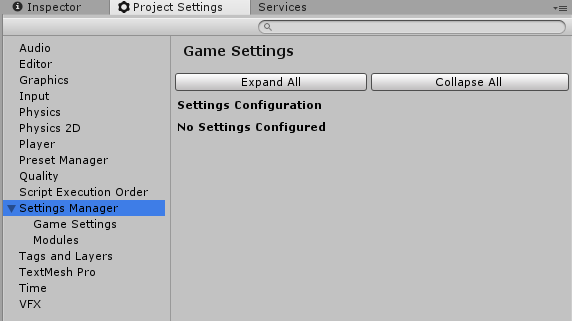
To begin configuring your game settings, you will need to go to Edit -> Project Settings in the Unity Editor and open up the Settings Manager header. There you will see two subheaders; Game Settings and Modules.

Modules are optional and can be used to create multiple separate settings menus, such as Video Settings and Audio Settings.
Game Settings is where you setup the settings that will be available. Open it up and click the Add Setting button to create your first custom setting.
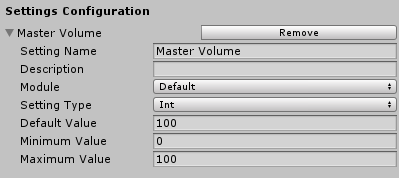
Configure your new setting as below:

Accessing Settings
Once you have configured your settings in the editor, you're ready to start referencing them in your code. This is done using a static class named GameSettings. You will need to add a reference to the UtilityLoris namespace, and from there you can do the following:
GameSettings.GetIntValue("Master Volume");
You could also use the OnSave event to write a manager script for your audio devices, for example:
private AudioSource[] _audioSources;

public void Awake()
{
    var volumeSetting = GameSettings.GetEditableIntSetting("Master Volume");
    SetVolume(volumeSetting.GetValue());
    volumeSetting.OnSave += SetVolume;
}

private void SetVolume(int? value)
{
    var volume = (float)value / 100;
    foreach (var audioSource in _audioSources)
    {
        audioSource.volume = volume;
    }
}
This script would make it so that any time a change to the master volume setting was saved, it would be propagated out to your audio sources. You may have a different, possibly more complex setup than this in your game, but this provides a good example of how you might implement your code.
Creating Your First Menu
To create a settings menu, you will first need to add a menu manager to your Unity Scene. Add a SettingsMenuManager component to an object in your scene, for example the root canvas of your menu UI and inspect the module you wish to use from the dropdown.
Next you will need to create your inputs:
- Create two inputs in your scene; a
Sliderand anInput Field - Select your newly created
Sliderand add aSliderBindercomponent. In the inspector, select Int for the Value Type and Master Volume for the Bound Setting - Select the previously created
Input Fieldand add anInputFieldBindercomponent. Configure the inspector the same way you did for the slider.
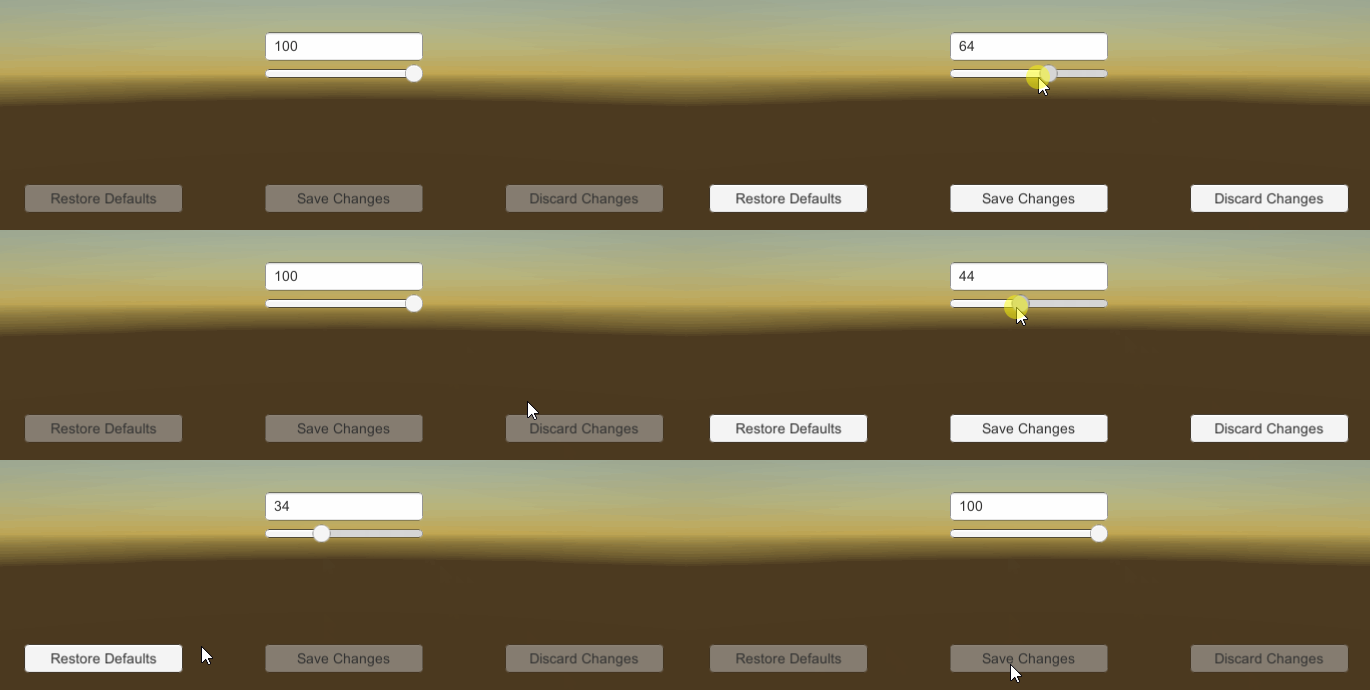
If you run the scene now, you should find that when you adjust the slider, the contents of the text box change, and vice versa!

To finish, we want to add some basic menu functionality - the ability to save changes, discard changes and restore defaults. To do this, you can do the following:
- Create three buttons
- Add a
SaveChangesButtoncomponent,DiscardChangesButtoncomponent andRestoreDefaultsButtoncomponent to each of the buttons respectively - For each of the components, make sure to add the
SettingsMenuManagercomponent from your scene to their configuration in the inspector
If you run the scene now, you should have three buttons that allow you to control your menu. The Save Changes Button will be disabled when nothing is modified or the settings are invalid, the Discard Changes Button will be disabled when nothing is modified and the Restore Defaults Button will be disabled when all settings match their default values.

Summary
If you've followed this guide exactly, you should have the following:
- An integer setting called Master Volume in the Default module
- A scene containing a
SettingsMenuManager, configured to manage the Default module - Two inputs (an
Input FieldandSlider) both bound to the Master Volume setting - Save Changes, Discard Changes and Restore Defaults buttons all assigned to control our
SettingsMenuManager
This should give you a fully working settings menu, albeit one that only allows you to control one setting. From here you can add as many as you like.
